Last week, I finally finished a project I’ve been poking at for an hour or two here and there over the last year. It was a sort of modest attempt at making something for myself instead of for a client, which I rarely had the time or inclination to do while working as a production artist, and an excuse to learn Redshift3D, which is a fantastic GPU renderer. I’m pretty obsessed with rain, growth processes, and the north coast of California in general, so doing a forest scene seemed like it would cover all the necessary bases. I also wanted to try to make the scene as procedurally-driven as possible, and I suppose it’s *mostly* procedural, aside from a few textures and the hero plant simulation. Here’s the final product:
rainy forest cinemagraph from Toadstorm Inc on Vimeo.
The next few posts on the nerdblog here will be describing some of the processes used in creating this scene. I tried to keep things as organized and as procedural as possible, though of course in practice there are always going to be loose ends and corners cut. Some caveats before I start:
- The scene scale is totally screwed up. Yes, I know, noob mistake.
- There are a lot of caches. These sort of grew organically so that I could iterate on things faster. The /out/ context has a dependency chain that probably will cook all these dependencies, but I’m not guaranteeing it will work perfectly as-is. Sorry.
- It was dumb to use RS Sprite on extruded geometry. I mostly got away with it, but it doesn’t hold up well up-close around the edges.
- I may have forgotten a dependency in the .ZIP file I uploaded. It’s certainly possible and honestly likely that something is missing, and in this case please let me know so that I can include it.
Okay. With that out of the way, here’s the HIP file and some textures: rain_leaves.zip
Now, onto Part 1: The Stump and Moss.
The Stump
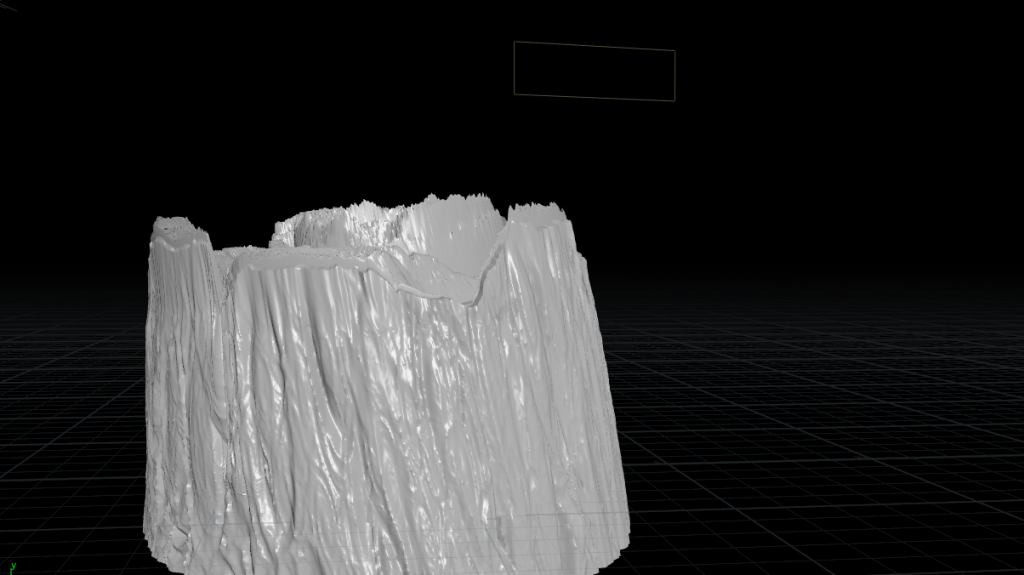
There’s not a ton to say about the base model of the stump itself… polygon modeling in Houdini can be a bit awkward, but it’s still more or less the same old extrude > bevel > whatever that you’re used to from other packages, but with better booleans. I won’t go into detail about this part except to say that some care was used in creating primitive groups like “top” and “sides” in order to better mask deformations later in the node tree. The /obj/stump_build node encompasses all of this, while the (slightly) more interesting stuff happens in /obj/stump.
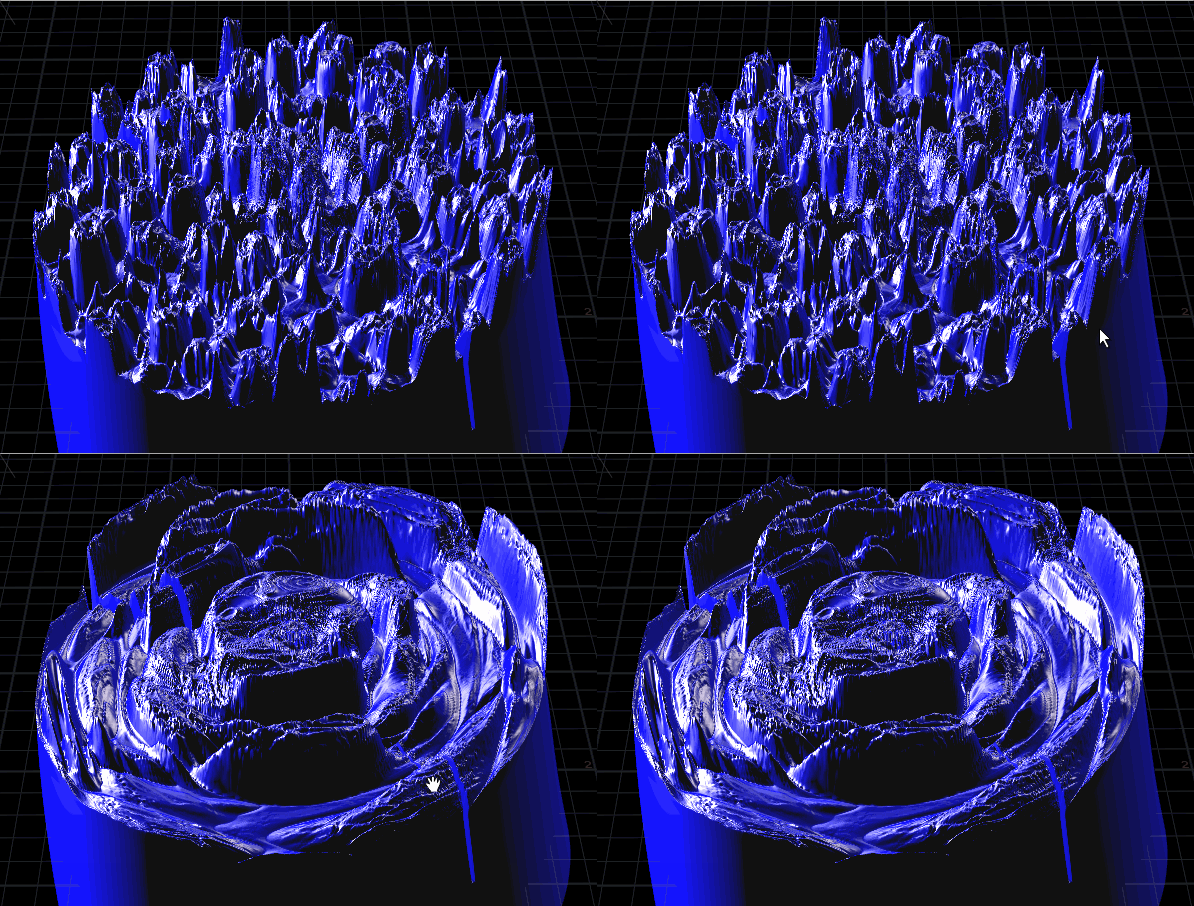
To get the splintery wood look on top of the stump, I used Unified Noise in a Point VOP to push points upwards. The only unusual bit here is that I converted the lookup position for the noise from world coordinates to polar coordinates first. As long as the center of the stump is at the origin, converting from world coordinates to polar coordinates allows me to warp the noise into a circular pattern, which feels more like wood rings. In a Point VOP, this is done by connecting P to a To Polar VOP, and then connecting the output U to the Z-component of a Float to Vector VOP, the output V to the Y-component, and the output radius to the X-component. This vector is then used as the input position for the Unified Noise VOP. You can see the difference between the noise in world space versus polar space here:
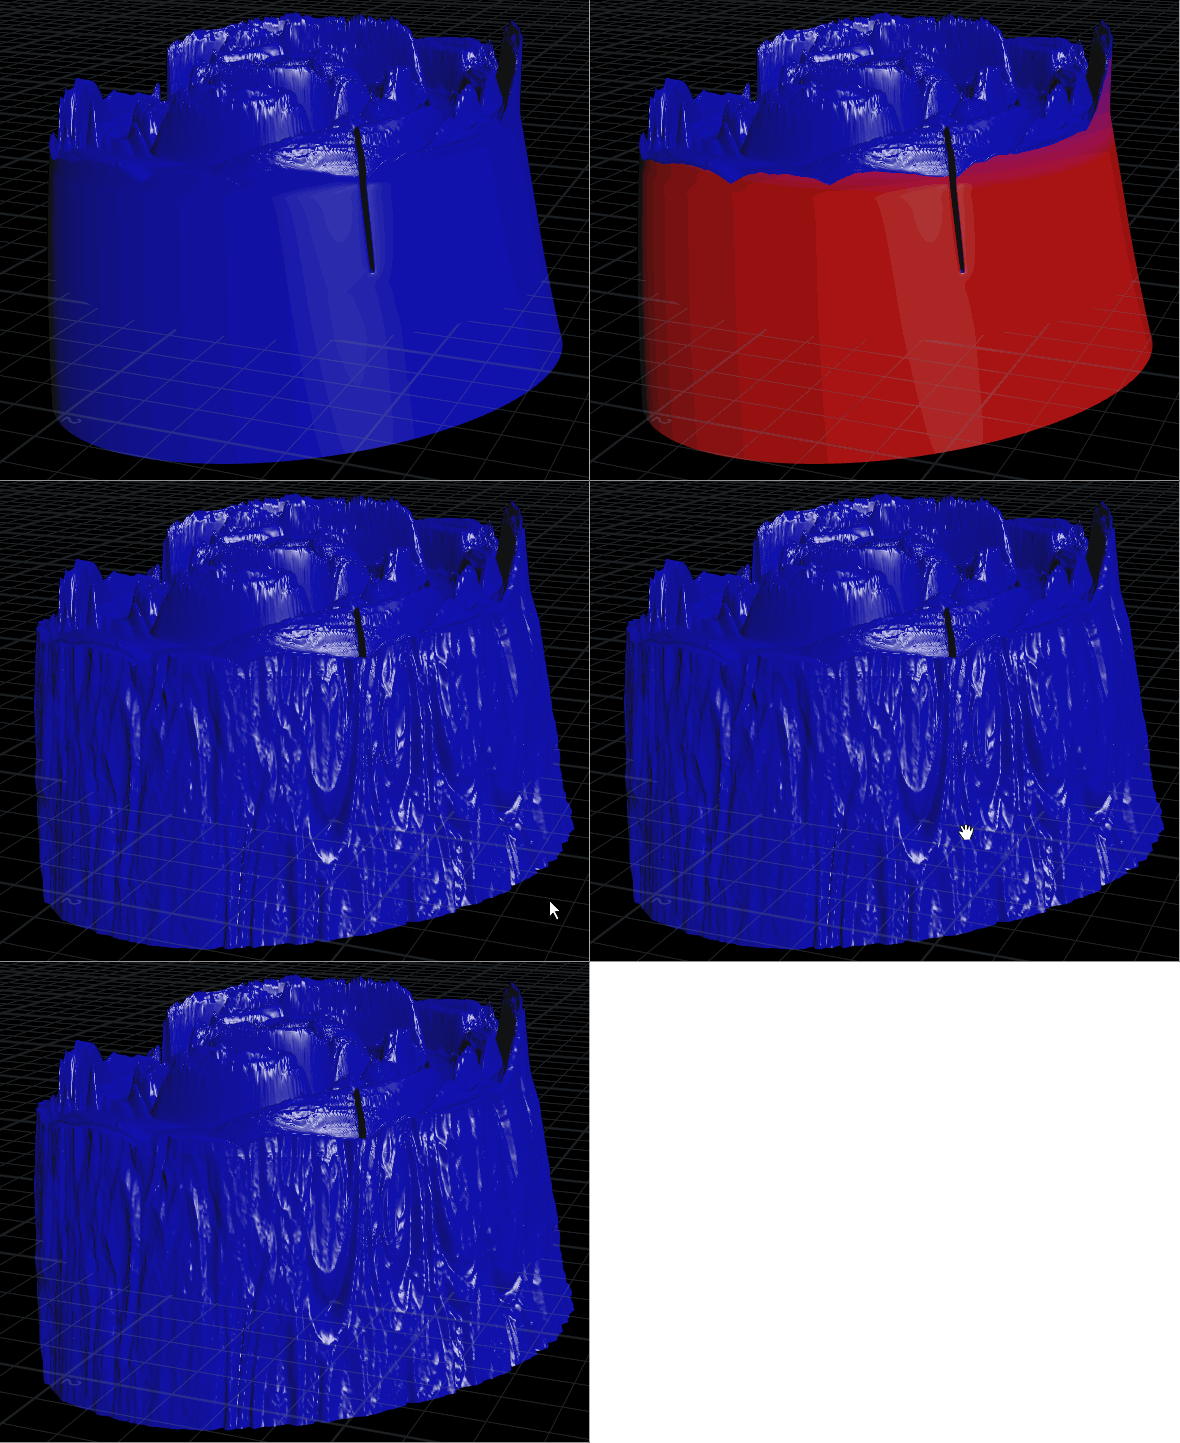
This noise is applied to just the top group. The sides are then displaced via a Mountain SOP, which is just more noise, masked slightly by the Y-position of the points so the noise tapers off towards the top:
That’s more or less it for the stump. A photograph-based bark diffuse texture and normal map, mixed with an “algae” shader based on some stringy noise, and the stump is done.
The Moss
The moss is using everyone’s favorite: L-systems! It’s not a scary or complex system at all, though. There’s two systems, one for the “stem” and another for the small “branches” coming out of that stem. They’re following the same ruleset:
Premise: FX

Rule 1: X=~(b)FX
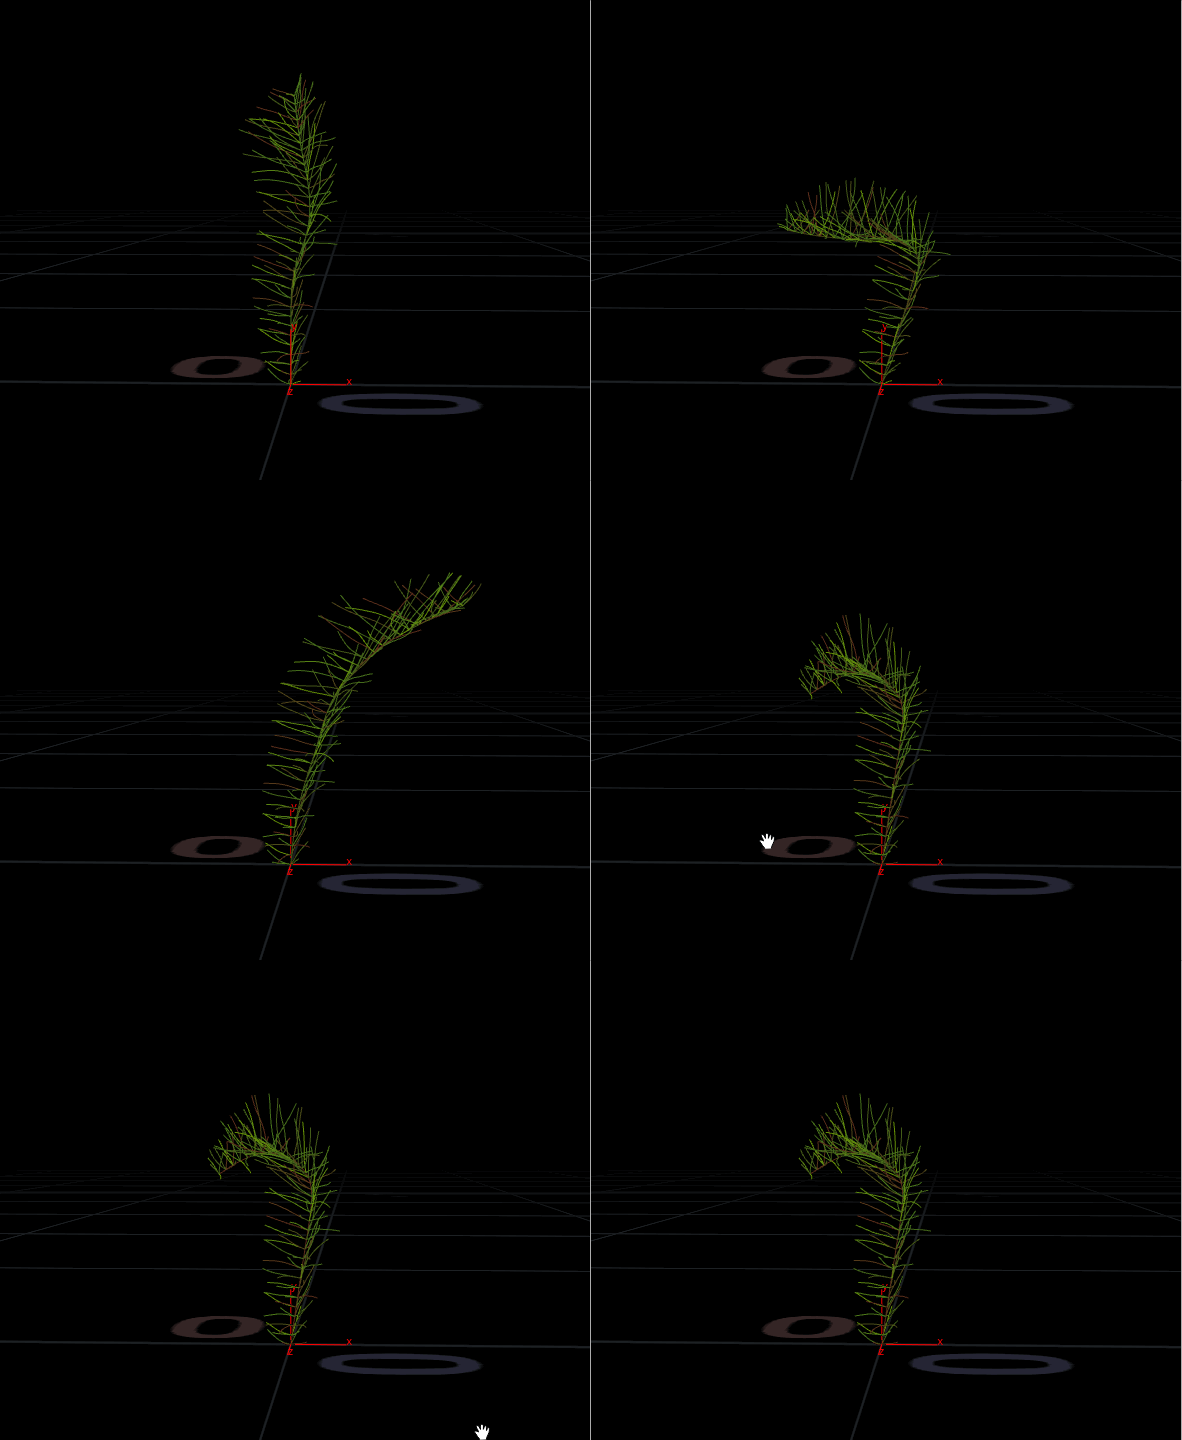
…which more or less translates to “wiggle around randomly by b degrees and grow forward.” Four slightly rotated variations of each branch are copied to each point along the stem, to create clusters of branches, and some random coloration is applied along with a width attribute in order to taper the tips of the structures. Each copy’s seed is varied with a *gasp* stamp expression. The seed of the final structure is set to vary per-frame, and then ten frames are written out to disk for instancing later.
Some painted masks are multiplied against noise in order to generate a density attribute for scattering, and the scattered points are given randomized scales and type attributes, corresponding to the ten L-system variants written to disk previously. The instances are randomly rotated along their local X-axis (their “spin” axis, so their roots still stay planted in the stump) using the following code:
// pick index for copying i@type = (int)fit01(rand(@ptnum),1,10); vector up = {1,0,0}; matrix3 m = maketransform(@N,up); float amt = fit01(rand(@ptnum+123),-3.14,3.14); rotate(m,amt,@N); p@orient = quaternion(m);An orientation frame (3×3 matrix) is constructed from N and up, which gives us a starting basis for each copy’s orientation. A random value between -pi and pi radians is generated, corresponding to a rotation of -180 to 180 degrees, and the orientation matrix is rotated around the normal to “spin” each copy randomly. The resulting matrix is converted to a quaternion and bound to
orient, which is automatically read by the Copy SOP to orient each copy.If that all sounded completely insane, check out this post for more details on the Copy SOP, matrices, and quaternions.
Moss that’s growing closest to the surface of the stump is flagged as “dead” with a
deadpoint attribute, and scaled down slightly to make it look more withered. This is done with a simpleminpos()anddistance()expression, which together compute the distance between each moss instance point and the nearest point on the stump surface. Any moss that’s close enough, based on a “threshold” channel, is flagged with@dead=1to be used later in the shader. Moss tends to stack up on top of itself, with the dead moss forming a bed underneath the new moss, so this helps lend some realism to the scene.The moss Redshift shader is using both the
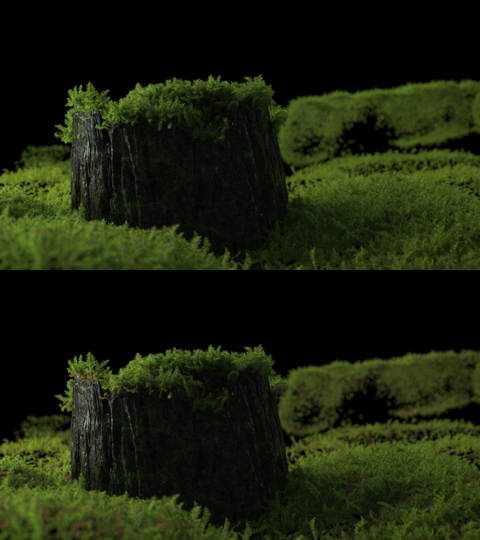
Cdpoint attribute and thedeadpoint attribute to vary the appearance of the moss. Cd is used on live moss to directly set the diffuse color, and a slightly color-corrected Cd is used for translucency. Each of these values, along with an alternate “dead” color value, are piped into RS Shader Switch nodes, which are controlled by thedeadattribute. This way, all moss has the same overall shader, but the point colors can all vary, and moss procedurally flagged as “dead” can render with very different shading attributes.The moss, before and after the “dead” attribute is used to modify both the instance scale and the shader attributes.
Redshift only supports old-school instancing as of the writing of this post, so in order to try to keep things as clean and procedural as possible, I spent a little extra time setting up the necessary /obj/ networks. There are ten different
moss_loaderobjects. Inside each one is a File node pointing to a path on disk. Ten moss variants were exported from the system described above, as .bgeo files namedmoss_types.#.bgeo.sc. Rather than actually type in the exact path, each file node is using the expressionmoss_types.`opdigits($OS)`.bgeo.scso that the moss .bgeo file loaded is matched numerically to the number at the end of the object node itself, somoss_loader3always loadsmoss_types.3.bgeo.sc. This way, I can just set up one of these, duplicate it a bunch, and they’ll all be properly linked without any additional work. Finally, in theRENDER_moss_RSobject, I use some VEX to randomly set thes@instancepoint attribute on all the moss template points, in order to randomly pick from these /obj/ networks for instancing:string prefix = "/obj/moss_loader"; int type = (int)fit01(rand(@ptnum), 1, 10); s@instance = sprintf("%s%d", prefix, type);This might look a little arcane, but it’s just making a “prefix” out of the start path of the instance container, generating a random number between 1 and 10, and appending that number to the prefix via the
sprintf()function. Binding that attribute tos@instancewill allow the Instance containerRENDER_moss_RSto pick which geometry gets instanced to what point.That’s it for the stump and moss! The next section will discuss the most irritating part, the hero plant simulation!



5 Comments
kinnikinick · 03/20/2018 at 09:06
Nice work – I was watching the video for a while, enjoying the mood and waiting for something to happen, then finally realized it was looping…
looking forward to seeing what other hoops you can make Redshift jump through!
Bonsak · 03/20/2018 at 10:35
Lovely!
David Uebergang · 03/20/2018 at 23:22
Where does (int) before the fit01 at the end of this post come from? It’s not in the fit01 docs and afaik it’s not type casting ie. doing the fit01 as a float and rounding to nearest int. In that case the int would wrap around it….
Anyway this is awesome thank you! Digging through the project files and this blog very slowly.
toadstorm · 03/20/2018 at 23:34
http://www.sidefx.com/docs/houdini/vex/lang.html#type-casting
There’s other ways that would probably work fine, like the
rint()function, but type casting worked well enough for this example.R · 03/24/2018 at 07:56
Part 2 please! :)
Comments are closed.