Houdini

The rainy forest cinemagraph, Part 2

Continued from the previous post.

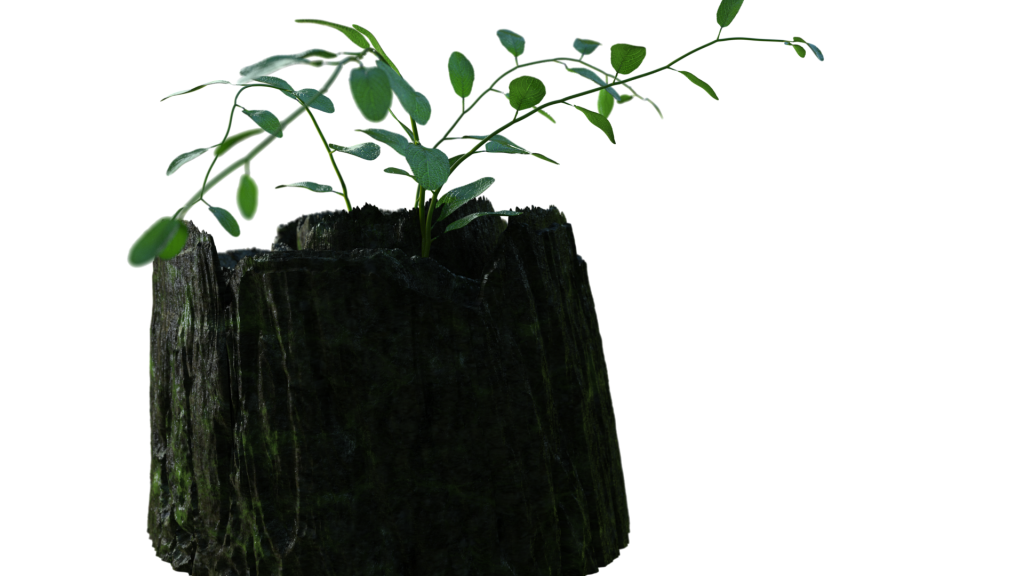
Part 2 here is all about the hero plant, which was by far the most time-consuming part of this whole process. The animation ended up being done primarily using FEM, which in retrospect was probably overkill. If I were to try this again, I’d probably try to build a more procedural system involving IK chains with maybe a layer of simple soft body dynamics on top to add springiness. Going the FEM route meant that each iteration took about 30 minutes to simulate, which adds up pretty fast. There are some neat little shortcuts elsewhere in the process, though, that hopefully some readers will find useful.

The hero plant

I am a masochist so I again started with L-systems to create the basic plant structure. L-systems are one of those things that start very simple and quickly build in complexity until they’re totally unreadable, so you generally want to keep notes of what the rules are actually doing as you build them. Of course, the notes from the original .HIP file that I posted are outdated, as they apply to an older version of the plant, so if you’ve already checked out the .HIP you may want to read these more accurate notes.

Here’s what the rules look like:

(more…)

Houdini

The rainy forest cinemagraph, Part 1

Last week, I finally finished a project I’ve been poking at for an hour or two here and there over the last year. It was a sort of modest attempt at making something for myself instead of for a client, which I rarely had the time or inclination to do while working as a production artist, and an excuse to learn Redshift3D, which is a fantastic GPU renderer. I’m pretty obsessed with rain, growth processes, and the north coast of California in general, so doing a forest scene seemed like it would cover all the necessary bases. I also wanted to try to make the scene as procedurally-driven as possible, and I suppose it’s *mostly* procedural, aside from a few textures and the hero plant simulation. Here’s the final product:

rainy forest cinemagraph from Toadstorm Inc on Vimeo.

The next few posts on the nerdblog here will be describing some of the processes used in creating this scene. I tried to keep things as organized and as procedural as possible, though of course in practice there are always going to be loose ends and corners cut. Some caveats before I start:

  • The scene scale is totally screwed up. Yes, I know, noob mistake.
  • There are a lot of caches. These sort of grew organically so that I could iterate on things faster. The /out/ context has a dependency chain that probably will cook all these dependencies, but I’m not guaranteeing it will work perfectly as-is. Sorry.
  • It was dumb to use RS Sprite on extruded geometry. I mostly got away with it, but it doesn’t hold up well up-close around the edges.
  • I may have forgotten a dependency in the .ZIP file I uploaded. It’s certainly possible and honestly likely that something is missing, and in this case please let me know so that I can include it.

Okay. With that out of the way, here’s the HIP file and some textures: rain_leaves.zip

Now, onto Part 1: The Stump and Moss.
(more…)

Houdini

A Long-Winded Guide to Houdini Instancing

An updated version of this article is now available here: https://www.toadstorm.com/blog/?p=942

On the Houdini Discord server(s) I keep seeing the same kinds of questions over and over again, mostly related to instancing. The most common questions asked seem to be:

“How do I randomly rotate/scale my copies?”
“How do I rotate each copy along a specific axis?”
“How do I randomly change what objects get instanced?”
“Why am I not supposed to copy stamp anymore?”

Houdini’s documentation can admittedly be a little vague at times, but more importantly they expect you to have a decent understanding of how some fundamentals of computer graphics work, like how a 3×3 matrix works for orientation. I’m admittedly not great at math, so hopefully I can explain everything both intuitively and in such a way that I don’t completely embarrass myself in front of people who actually know what they’re talking about (i.e. this guy).

Anyways. The Copy SOP.

One of the first things to learn about the Copy SOP is that the point attributes on the points you’re templating to can influence how each copy is placed in the world. Aside from the obvious position of each point, P, there are a few other attributes with obvious effects. You can view the complete list here: http://www.sidefx.com/docs/houdini/copy/instanceattrs The important ones to remember are:

  • v@N and v@up (these vectors work together, explained later)
  • f@pscale (uniform scale of each copy)
  • v@scale (a vector that can scale each axis independently)
  • p@orient (a QUATERNION that defines the orientation of each copy
  • p@rot (another quaternion that defines an additional rotation)

(Keep in mind that those little @ prefixes in front of the attribute names are only used in Wrangle nodes… they’re just there to hint to Houdini what attribute type they are. For common attributes you typically don’t need to include them in your Wrangles, and you never need to use them when writing group masks.)

Now, in many situations, you can get by with just using the Attribute Randomize SOP to randomly generate an N attribute for you, and a random float for pscale, and you’re good to go. But there’s always going to be times where you need specific orientations for copies, and these times are when you’ll need a more thorough understanding of what the Copy SOP is doing under the hood… (more…)
Houdini

The joy of xyzdist() and primuv()

I’m going to try to make a nice easy introduction to my two favorite functions in Houdini VEX (besides fit01 and chramp of course): xyzdist and primuv. These functions are at the core of a lot of really useful and cool tricks in Houdini, including rivets, the attributeInterpolate SOP, the old “droplets falling down a soda can” effect, and some really awesome stuff with volume shaders. I’ll do a little example of each as a way of showing off what you can do with these clever little tools.

First, let’s take a look at the VEX definition (the third overload here is the most frequently used):
float xyzdist(string geometry, vector pt, int &prim, vector &uv, float maxdist)

At its most basic, xyzdist will return the distance from the sample point pt to the nearest point on the surface geometry. Note that this doesn’t mean the nearest actual point, but the interpolated surface in between those points.

Those little “&” symbols mean that this function will write to those parameters, rather than just read from them. So if we feed this function an integer and a vector, in addition to the distance to the surface, it will also give us the primitive number prim and the parametric UVs on that primitive uv. Note that parametric UVs are not the same as regular UVs… this just means the normalized position relative to the individual primitive we found.

So, what can we do with this? Click below to find out…

(more…)

Maya

automated path substitution in maya.

I’m trying to build a system right now that can automatically substitute environment variables for paths on a per-scene basis. When a user opens a Maya file, I want to parse that file and set temporary environment variables called $SHOW, $SEQ and $SHOT that point to the show’s root folder, the sequence’s folder in that show, or the shot in that sequence. The variable names and paths I’m trying to get are pretty specific to the current pipeline I’m working on, but this essentially lets me use relative paths in Maya but WITHOUT using Maya’s outdated and inflexible workspace system. I don’t want an individual Maya project for every single shot and asset in the entire show, and I don’t want all of my Maya scenes to be forced to live within a single workspace, either.

I’ve solved this problem before by using symbolic links to basically force all of the Maya projects generated for every single shot and asset to link to the same place. This makes for a pretty busy-looking file system, though, and symlinks only work on Unix-based servers (i.e. not Windows). This system I’m building now looks a lot more like Houdini’s global variables… as long as I define $SHOW or $SHOT or whatever, I can path a reference or a texture to $SHOT/assets/whatever.xyz and it doesn’t necessarily have to be within a Maya workspace, and it’s also not an absolute path.

Read more below… (more…)